Projection Tool
![]() This tool projects any image from or into a defined area, transforming it as necessary.
The source image may either be the current layer or the image set as the current texture.
Some options under this tool correct for perspective, and may therefore be used to correct for, adjust or artifically add perspective effects.
This tool projects any image from or into a defined area, transforming it as necessary.
The source image may either be the current layer or the image set as the current texture.
Some options under this tool correct for perspective, and may therefore be used to correct for, adjust or artifically add perspective effects.
Some options of this tool require a texture to be loaded, which can be any image, preferably one that is larger than the destination area. This may be an existing image, or a composite formed by tiling. To load a texture, use the Texture menu under the Objects menu.
Some options of this tool use display options to control what is displayed when you are setting the points.
| Options | |||
|---|---|---|---|
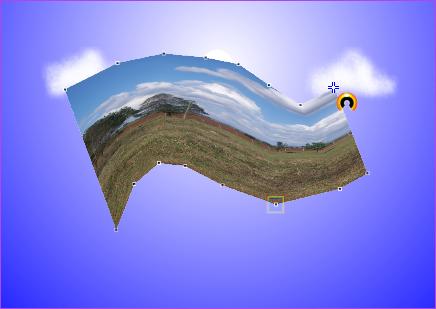
This option transforms the image in the current layer to fit into any four sided polygon region as specified by the user by clicking four points on the image. Perspective is adjusted accordingly. Please note that the points must be set in a circular manner, either clockwise or anti-clockwise. The first two points map to the top edge of the source image, while the last two map to the bottom. In the example below, the points were set in the order indicated by the numbers. Remember that you can always modify the points after setting them, and that you must right-click the image (or press Enter) to apply.
|
|||
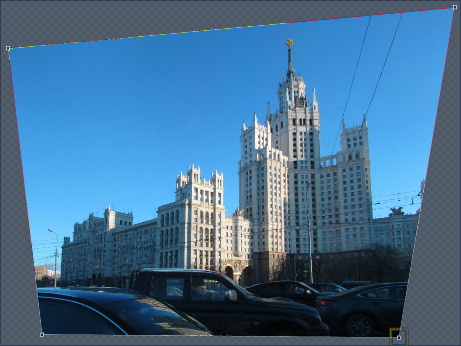
This option transforms any four sided polygon region into a rectangular image as specified by the user by clicking four points on the image. Perspective is adjusted accordingly. The user specifies any four sided polygon region by the user by clicking four points on the surface; the tool then uses that area as the source image and transforms it as required to fill the whole layer, applying perspective correction as needed. Please note that the points must be set in a circular manner, either clockwise or anti-clockwise. The first two points map to the top edge of the source image, while the last two map to the bottom. In the example below, the points were set in the order indicated by the numbers. Remember that you can always modify the points after setting them, and that you must right-click the image (or press Enter) to apply.
|
|||
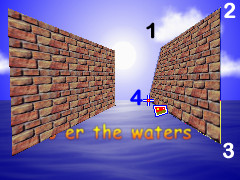
This option transforms the image set as the current texture to fit into any four sided polygon region as specified by the user. Once the texture is set, it can be applied to the surface by clicking four points on the surface. Please note that the points must be set in a circular manner, either clockwise or anti-clockwise. The first two points map to the top edge of the source image, while the last two map to the bottom. In the example below, the points were set in the order indicated by the numbers. Remember that you can always modify the points after setting them, and that you must right-click the image (or press Enter) to apply.
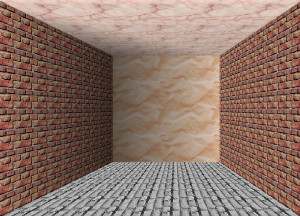
The mapping is done with perspective enabled. This gives the illusion of depth when this tool is used to compose objects, as in the two walls above. You can extend this functionality to draw complete objects, such as the hallway below:
|
|||
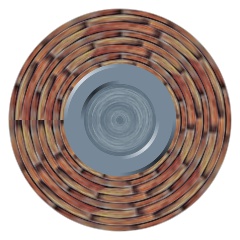
This option transforms the image set as the current texture to fit into a circle or ellipse; in other words, it turn the texture into a disk/ring. Once the texture is set, it can be applied to the surface by selecting a rectangular region on the surface. The circle or ellipse containing the texture will be drawn into this region (see example below) Remember that you can always modify the points after setting them, and that you must right-click the image (or press Enter) to apply.
|
|||
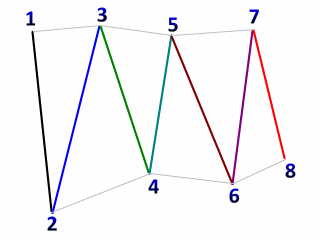
This option transforms maps any image set as the current texture into any shape of the user’s choosing. The said shape is created using several vertices in a triangle strip manner. Once the texture is set, it can be applied to the surface by clicking multiple points on the surface. These must be an even number greater or equal to four, and should follow a pattern like the one shown below:
The grey line shows the destination area. Remember that you can always modify the points after setting them, and that you must right-click the image (or press Enter) to apply. The mapping is done with perspective disabled (affline mapping) since the tool gives the user the ability to control this via the location of the points. The final image looks something like this:
You can use this effect to wrap images around objects quite easily.
|
 Transform
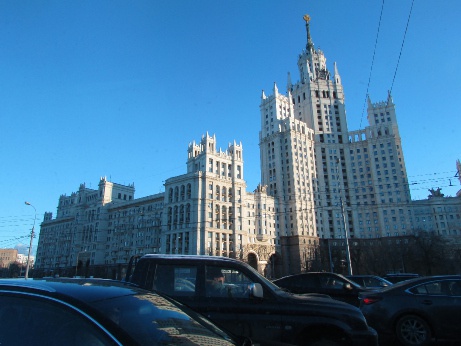
 Reverse Transform
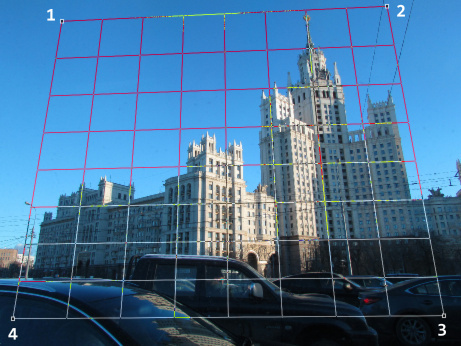

 Texture Polygon
 Texture Disk
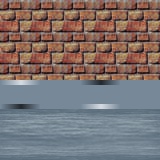
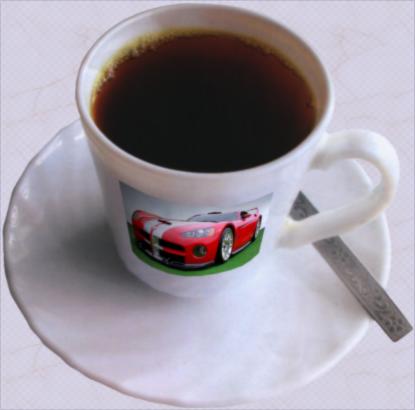
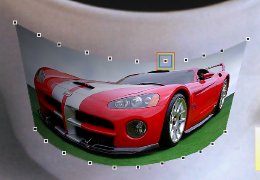
Example 1 : Warping an image around a 3D object (cup)
This is what we want to draw. Basically, we want to take a plain cup and warp a photo around it. Sounds complicated, huh? don’t worry, it’s actually easier than it looks. Just follow the instructions and you’ll see. This is what we intend to create:
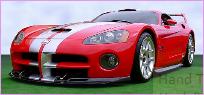
And this is the original image:

Begin by adding the picture you intend to warp around the cup as a layer:
Obviously, the cup has some lighting gradient on it; to avoid ending up with an image that looks like it’s floating, we apply some shadow to it using the
GT Shapes ![]() tool in Rectangle mode with black, black and alpha 0, 255. This is the result:
tool in Rectangle mode with black, black and alpha 0, 255. This is the result:

Now, we need to set up a texture. Right-click the image of the car, go to Objects, Texture, Initialize layer. The layer is initialized for use as a texture.
Now click the main layer to bring it to the fore. With the Projection ![]() tool in Strip mode
tool in Strip mode
 , map the texture to the side of the cup as shown:
To do this, you need to remember the pattern of points required, which goes like this:
And the result is this: